npm
npm is a package-manager. It lets you install over 1.3 million open-source packages and easily update those packages as new releases become available.
CodeKit offers a clean, easy-to-use GUI for npm:
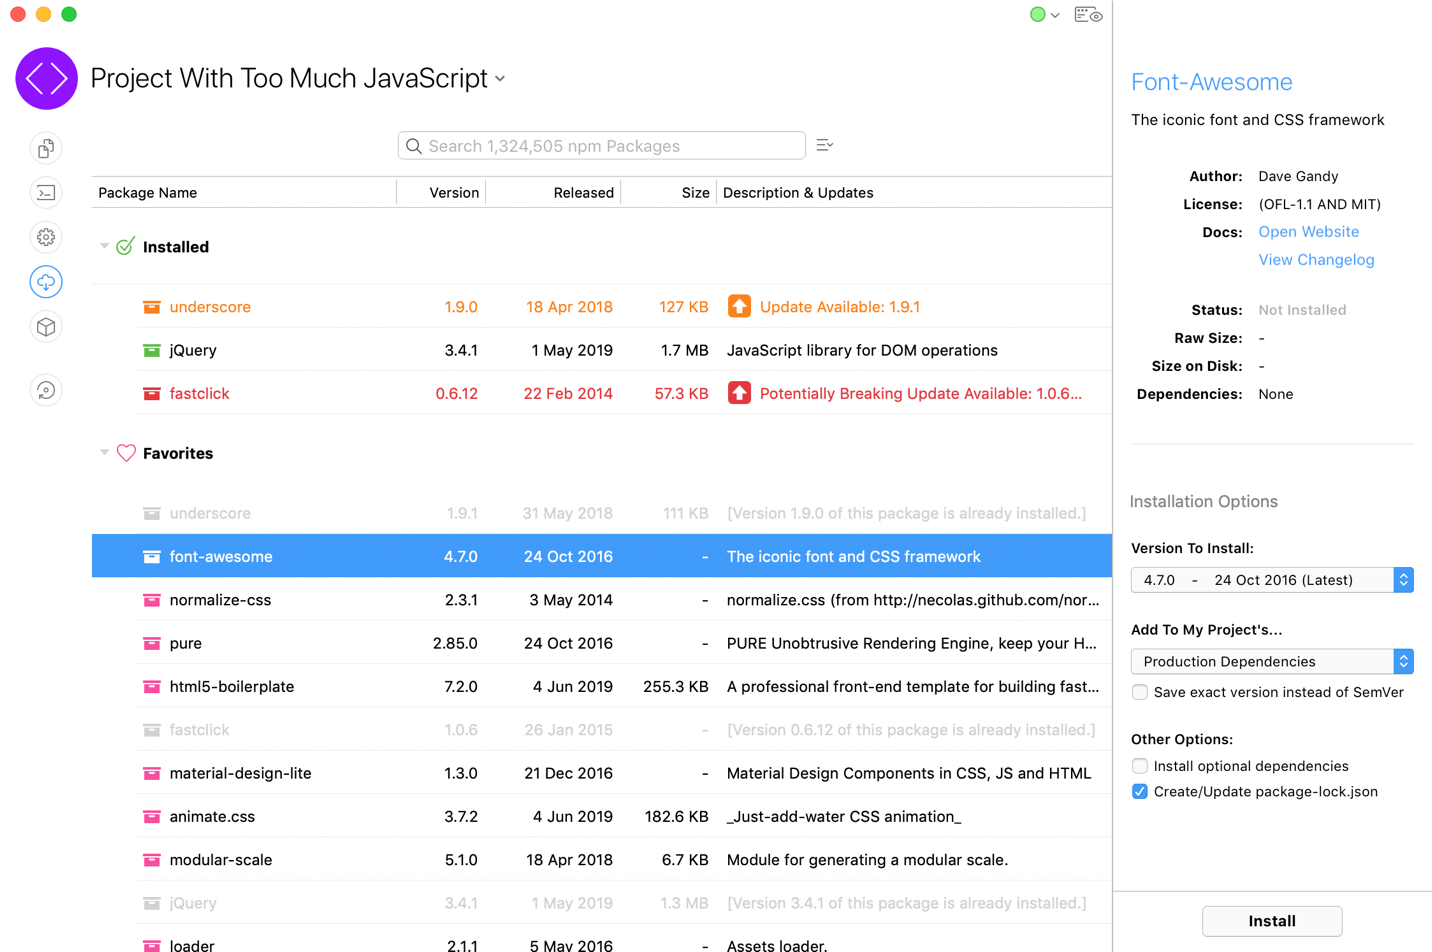
The Packages Area
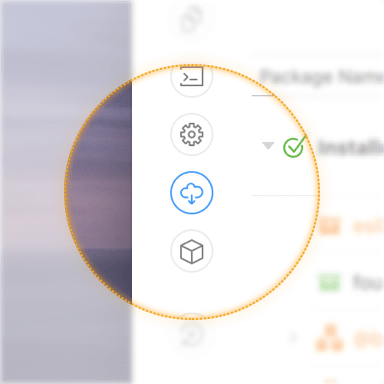
Click the Cloud button on the left side of CodeKit's window to open the Packages Area. Installed packages are listed at the top. Below that is a customizable list of favorite packages.
When no packages are selected, the sidebar displays summary information about all installed packages and common commands for manipulating packages.
Finding Packages
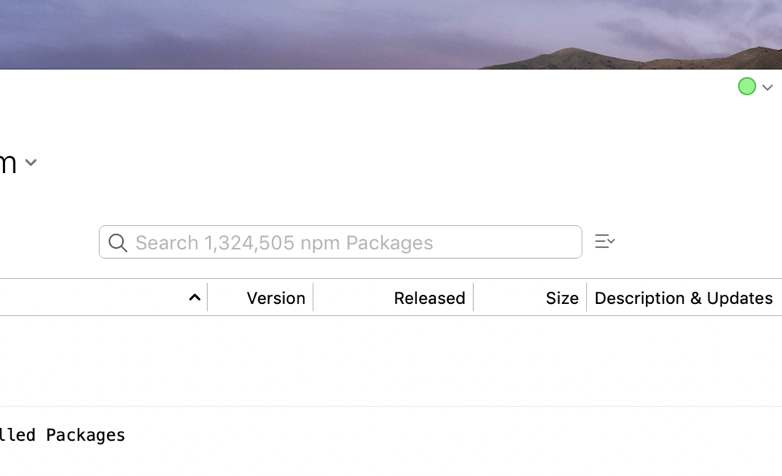
If a package is not in your Favorites list, use the search field to find it.
Searching here returns the exact same results as searching at npmjs.com.
TIP: To add a package to your Favorites list, control-click it and choose "Add to Favorites" from the menu.
Installing Packages
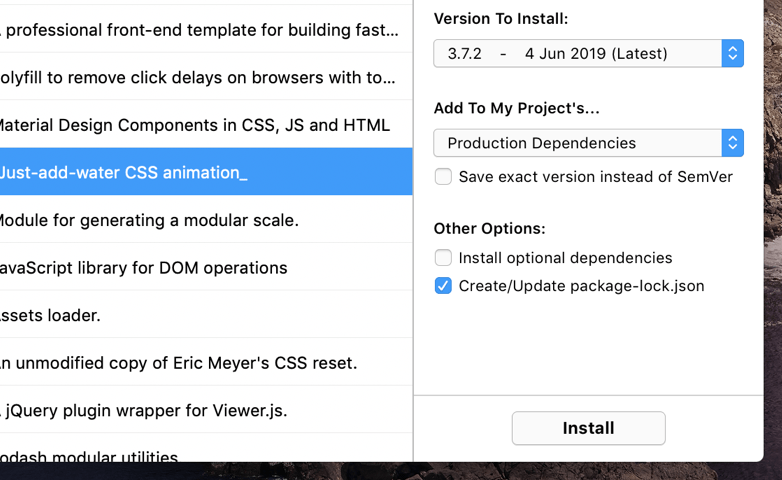
Select a package. The sidebar shows detailed information about that package. At the bottom of the sidebar, click Install. Alternately, control-click any package and choose "Install" from the contextual menu.
You can also install multiple packages simultaneously. Select them all and click "Install".
Package.json Files
When you install packages, npm creates two files: package.json and (optionally) package-lock.json. Do not delete these; they are required for npm to work correctly.
These files list the packages in your project and the specific versions you installed. CodeKit uses this information to warn you when updates contain changes that might break your code.
Installation Options

When a non-installed package is selected, the sidebar shows installation options:
Version
All official releases (including betas) are listed, as long as the package developer tagged releases. The list is populated dynamically and is only available when a single package is selected.
Dependency List
There are three "lists" in the package.json file to which an installed package can be saved. Production is for packages that are required for your project to work when deployed. Development is for packages needed to build your project, but not required once the project is shipped. Optional is for folks who just can't get enough JavaScript in their lives.
Save Exact Version Instead of Semantic Version
If you install jQuery 3.4.1, by default npm will allow updates to any future 3.x release of jQuery (but not 4.x). Checking this box forces npm to always install exactly jQuery 3.4.1 and no other version.
Install Optional Dependencies
Don't do this. The world has enough JavaScript in it.
Create Package-lock.json File
This file stores exactly how each package was resolved and installed in your project so that the exact same installation can be repeated in the future. While this file is not required, it's a good idea to keep it.
Installing Custom Packages
You can install packages that are not listed on the npm registry. With no packages selected, click the Install Custom/Unlisted Package button in the right-hand inspector. Alternately, click the menu item to the right of the search field.
This sheet appears:
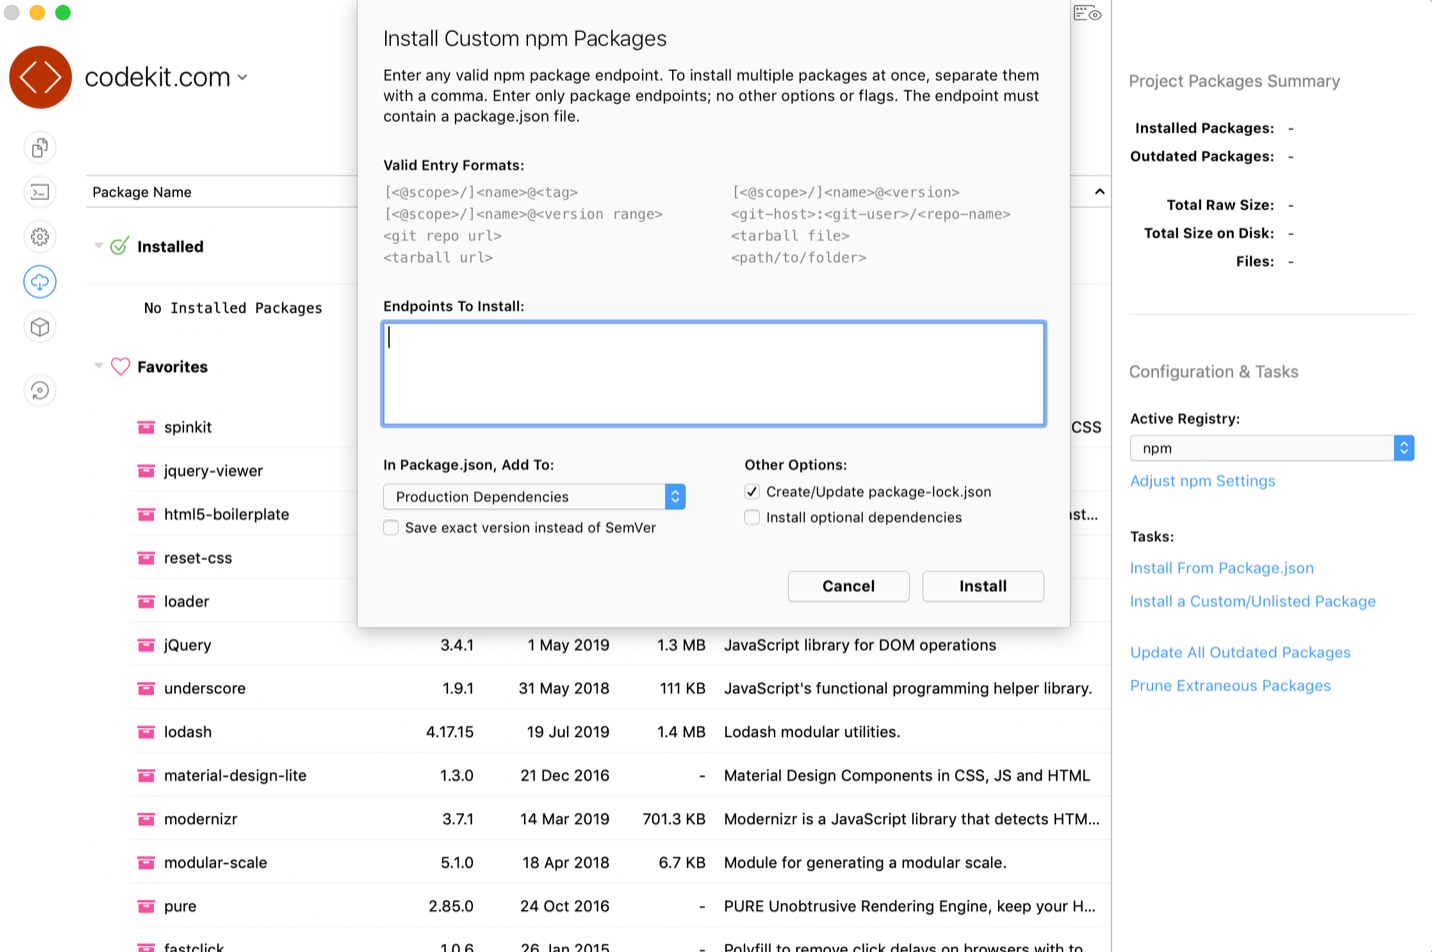
Enter any valid npm endpoint in the textfield. This can be a private Git repository, a local folder on your disk, a specific Git branch or tag, etc. Enter multiple endpoints by separating them with a comma.
Updating Packages
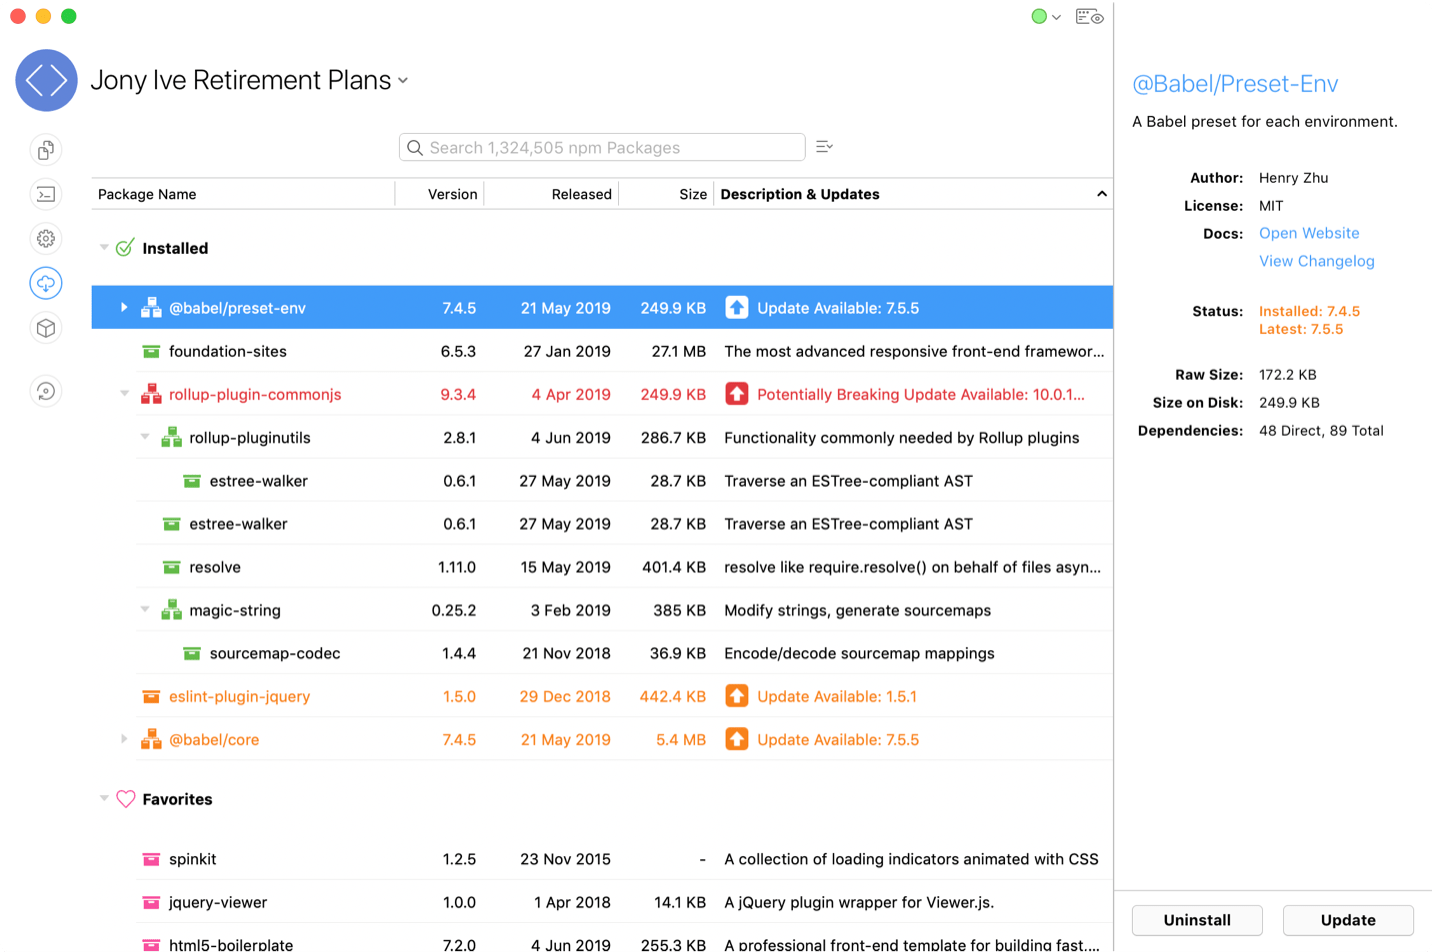
CodeKit marks packages that have updates available:
Safe Updates
Updates shown in orange are considered "safe". This means they fall within the version limits specified in your package.json file. By default, this limit is any update where the first non-zero number has not changed (e.g. 3.4.5 —> 3.9.1).
Safe updates can most likely be installed without making any changes to your own code. Of course, you should always test after any package updates.
Potentially Breaking Updates
Updates shown in red are those that fall outside of the version limits specified in your package.json file. By default, this limit is any update where the first non-zero number has changed (e.g. 0.4.5 —> 0.5.0)
You should read release notes carefully when installing these updates to make sure no APIs have changed or other unexpected issues arise. Test your code after updating.
Changelogs
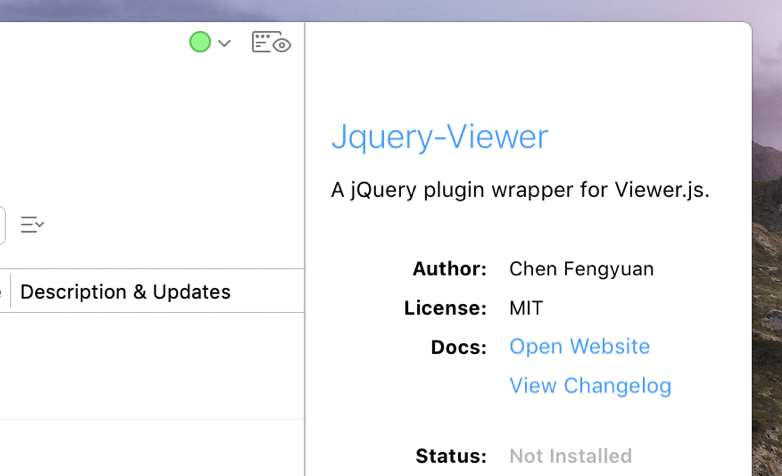
To help you evaluate updates, CodeKit can display a changelog for most packages (as long as the developer has published one).
Select the package, then click View Changelog in the right-hand Inspector.
Uninstalling Packages
To uninstall a package, select it and click the Uninstall button at the bottom of the right-hand Inspector. Alternately, control-click on the package name and choose "Uninstall" from the contextual menu.
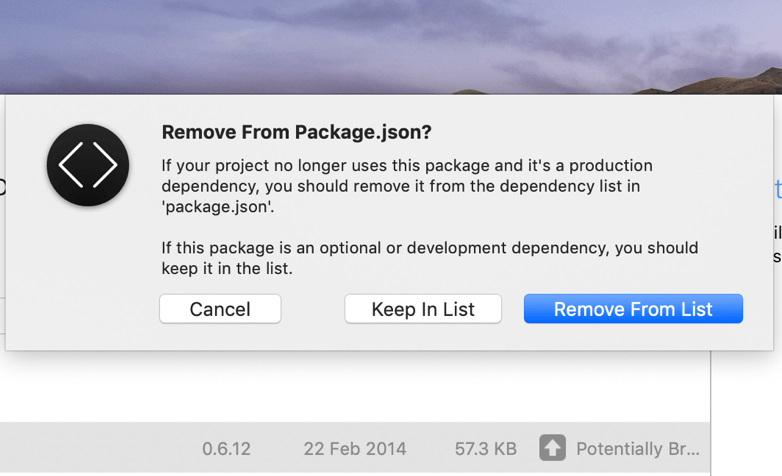
CodeKit will ask you if you want to keep the packages in your package.json list. If you might reinstall the packages later, keep them in the list. Otherwise, remove them.
Uninstall Top-Level Packages Only
Uninstall only packages that are in the top level of the "Installed Packages" tree. Packages farther down the tree are dependencies—they are required for top-level packages to work. If you uninstall them, things will break.
Side Effects of Uninstalling
When you uninstall a package, npm will automatically remove any other packages (dependencies) that are no longer needed by any top-level packages in your project. It will also install any packages specified in your package.json file that are missing.
Pruning Packages
Pruning is the process of removing all extraneous packages—those not explicitly listed in your package.json file or required by one therein.
Pruning happens automatically whenever you install, update, or uninstall packages. There are two cases where you might prune manually:
- If you edit a package.json file and remove entries in a dependency list instead of uninstalling them through CodeKit.
- If you want to remove all Development dependencies.
How To Prune Manually
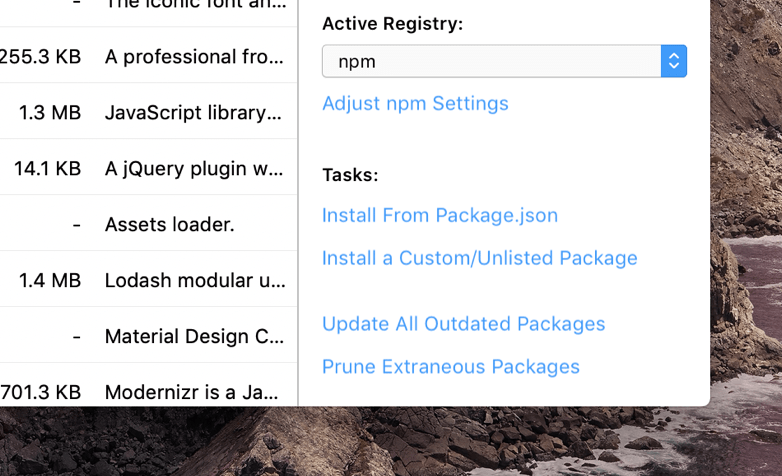
To prune, make sure no packages are selected, then click the Prune Extraneous Packages button in the right-hand inspector. Alternately, click the menu icon to the right of the main search field.
npm Project Settings
Open the Project Settings area and choose the npm & Bower category:
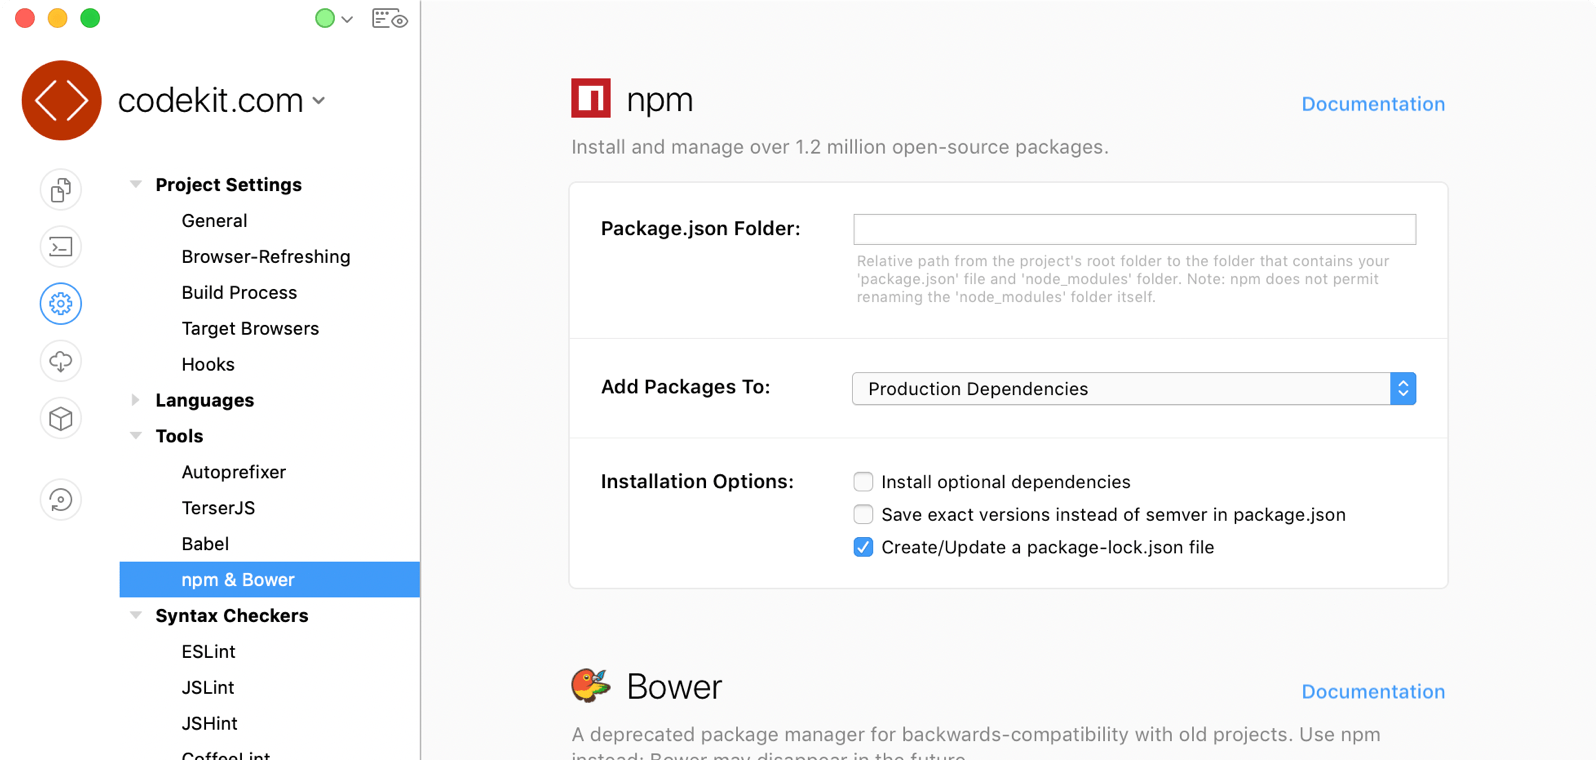
Relocate the 'node_modules' Folder
By default, npm packages are installed in a folder named node_modules in the root project directory. While this folder cannot be renamed (node forbids that), you can relocate it to any subfolder of your project by specifying a path in the first textfield.
NOTE: If you have previously installed packages, those will not be moved to the new location automatically, nor will packages in the old location be shown in the UI or resolved when compiling. Copy the old package.json file to your new location, then click Install From Package.json in the right-hand inspector in the Packages area.
Relocate the 'bower_components' Folder
You can relocate the bower_components folder in a similar fashion, except that Bower does allow renaming that folder. The last path component in the textfield will be the name of the folder into which components are installed.
Other Options
Set the initial values of npm and Bower installation options here. You can also set these for all future projects. See New Project Defaults.